Set up Multi-Factor Authentication (MFA) yourself
Use the link below to set up MFA for your college Microsoft account and ensure safe use of college resources from home.
To set up MFA for your college account correctly, you can follow the instructions provided below.
Setting up MFA for a Microsft account on PC
Below is a step-by-step guide to correctly setup secure access to your account, from home via PC. For any issues with setting up MFA for your account, please visit the Learning Resource Centre.
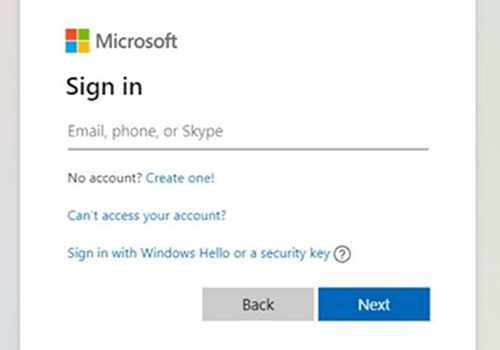
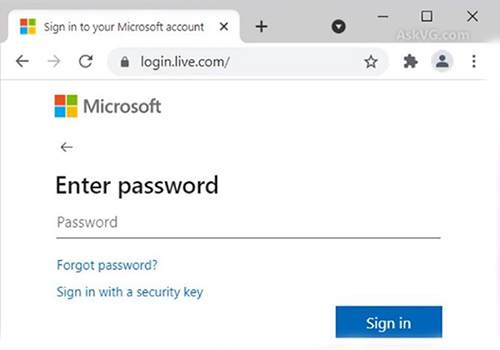
Step 1: Log into your Microsoft account using your College credentials
| Username | Password |
 |
 |
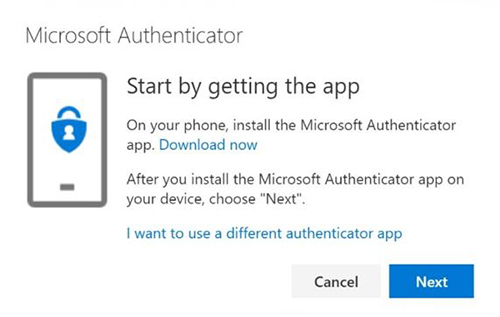
Step 2: Download the Microsfot Authenticator App on a mobile or tablet device. After downloading the app, click Next.
 |
 |
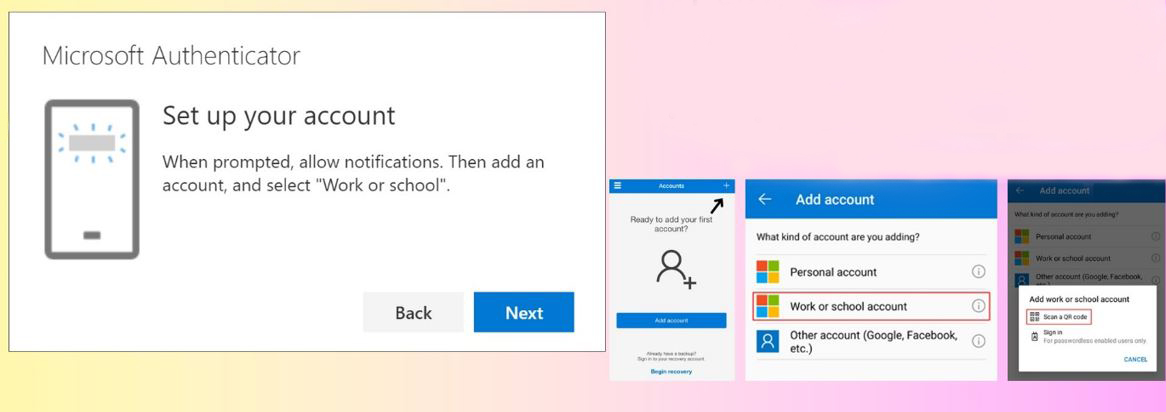
Step 3: Set up your Microsfot account on the Microsoft Authenticator App.
- Press the + symbol
- Press on work or school account
- Then press 'Scan a QR code'
- Press Next.
 |
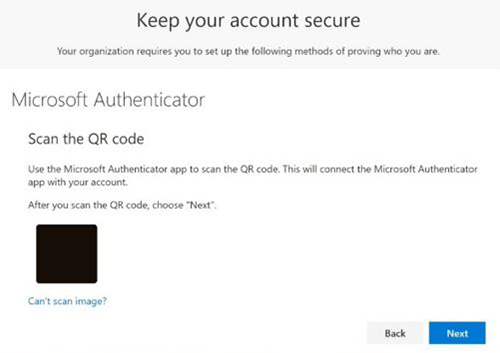
Step 4: Scan the QR code on your PC screen to successfully add your Microsoft account to the Microsoft Authenticator App.
 |
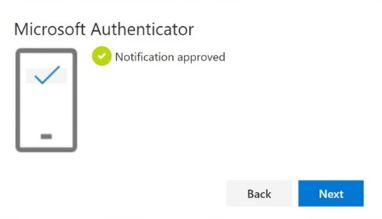
Step 5: Approve notification sent to Microsoft Authenticator App.
- After scanning the QR code, you should be prompted to enter a code to your device
- Enter the code and press Approve
- You should receive the second screen below after you have entered and confirmed the code.
 |
 |
Setting up MFA for a Microsft account on PC
Below is a step-by-step guide to correctly setting up secure access to your account, from home, via a mobile device. If you have any issues with setting up secure access for your account, please visit the Learning Resource Centre.
Step 1: Download the Microsoft Authenticator App on your device
| This is what the Microsoft Authenticator App logo should look like. | |
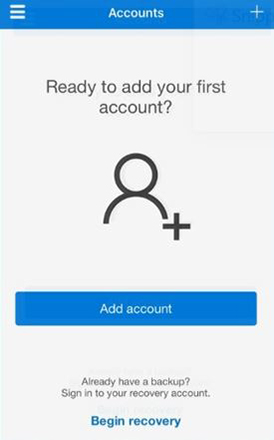
Step 2: Select the + symbol to add your account. Your app home page should look similar to the one in the picture below.
 |
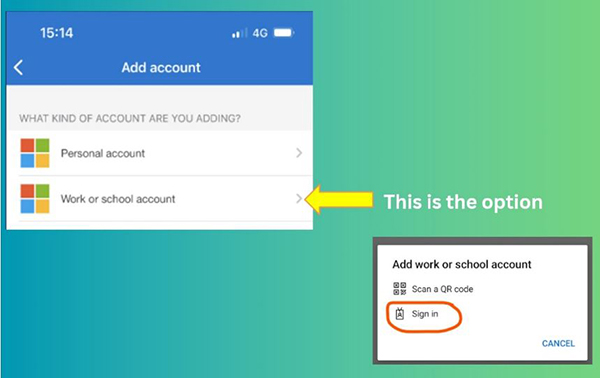
Step 3: Press the 'Work or School account' option. Make sure to select the sign in option.
 |
Step 4: Enter your college account login credentials.
- Make sure to use your college login details
- These will be the same ones as when you sign in normally.
|
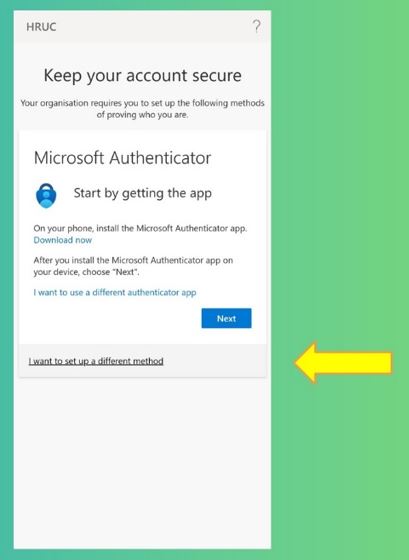
Step 5: Select 'I want to set up a different method'.
 |
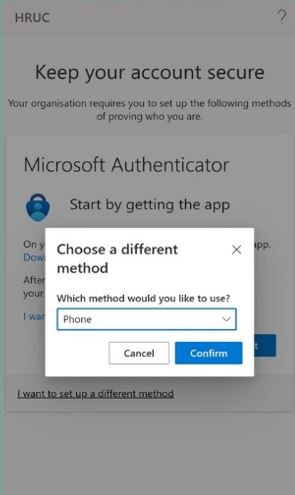
Step 6: Under 'Which method would you like to use' - select Phone to authenticate by a text for the 1st time.
 |
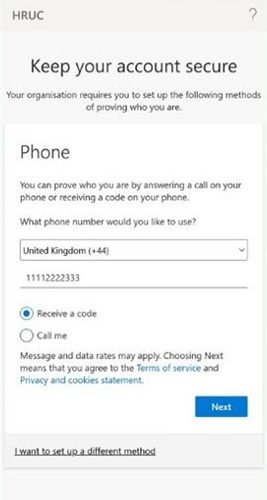
Step 7: Enter your phone number, select 'Receive a code' and select Next.
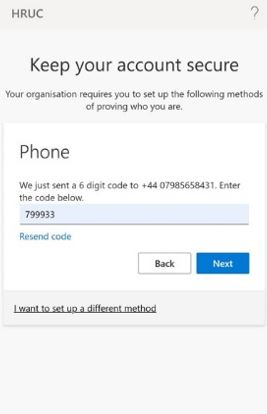
Step 8: Enter a 6 digit code sent to your phone and select Next.
 |
 |
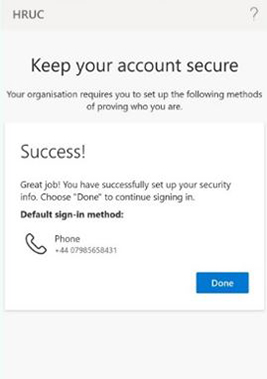
Step 9: Your Microsoft account should be successfully added.
- Click done
 |